
概要
先回はエクセルVBAから、IE (インタネットエクスプローラー)を操作し、簡単なデータ検索を行いました。
今回は、python と Beautiful Soup 4というライブラリを使って 先回行ったのと同じ英単語検索を試みました。 IEの開発は終了し、サポートも縮小しつつあるとのことですので、具体的利用も想定し、他の方法も調べてみようと思ったのが発端です。
最近、少し python にも触れ、ライブラリが充実しているので面白いと感じていますが、他の人にプログラムを配布するのが課題だと感じていました。ところが、python プログラムの “EXE化” についての記事を見つけましたので確認した内容も報告します。
ライブラリインストール
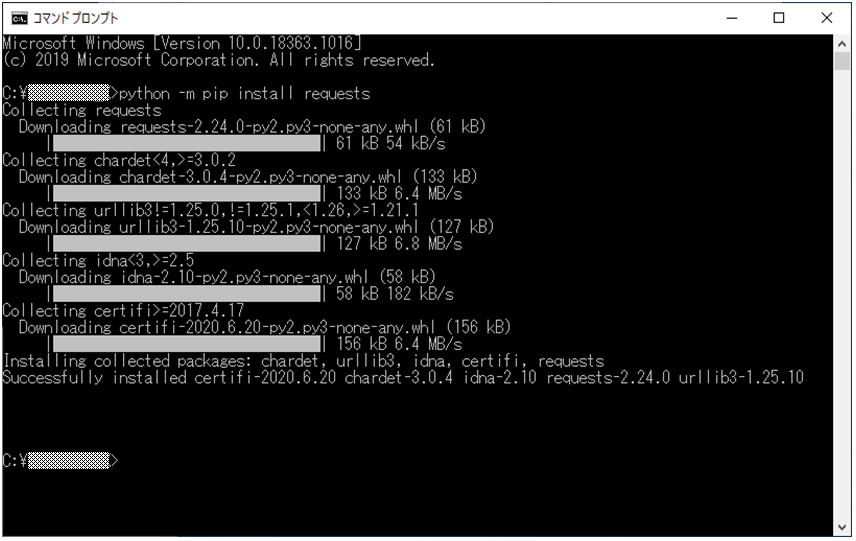
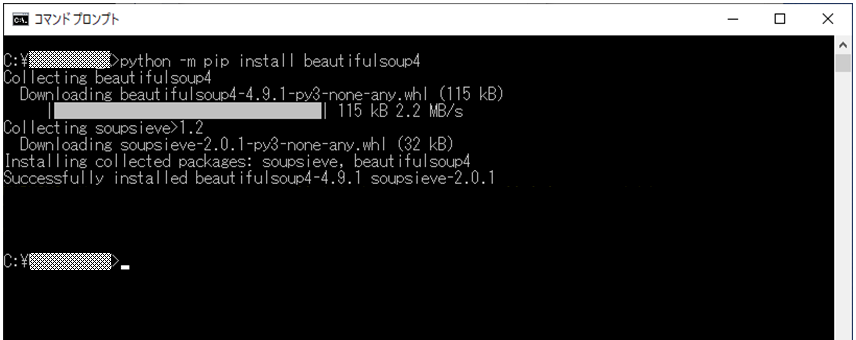
“requests”と“beautifulsoup4” というライブラリをインストールします。requests を使ってWebサイトのHTMLや画像などの情報を収集し、 beautifulsoup4 で欲しい部分を解析・抽出するという使い方と思います。
(1) requests インストール
(2) beautifulsoup4 インストール
Python WEB検索 テストプログラム
はじめに、 requests , Beautiful Soup 4 の使い方が判りませんので、下記プログラムを作成しながら使い方を学びました。
“requests” でWEBページのHTMLを取得し、Beautiful Soup 4 を使って、タグ,クラス,ID等から、必要情報を収集します。
import os
import urllib.error
import urllib.request
import requests
from bs4 import BeautifulSoup
import tkinter as tk
from tkinter import messagebox

# 画像ファイルダウンロード
def download_file( url , dst_path ):
    try:
        with urllib.request.urlopen(url) as web_file:
            data = web_file.read()

            with open(dst_path , mode="wb") as local_file:
                local_file.write(data)

    except urllib.error.URLError as e:
        print(e)


root = tk.Tk()
root.withdraw()

s_word = "apprentice"                                   # 検索単語

html_text = requests.get("https://[省略]/content/" +s_word).text
soup = BeautifulSoup(html_text, 'html.parser')          # BeautifulSoup初期化

# print(soup.prettify())                                # インデント処理

# タイトル取得
title_text = soup.find('title').get_text()              # タイトル
print("【TITLE】" + title_text)
print("")

# 単語・意味取得
chk_way="find"                                          # 検索方法選択
if chk_way=="find" :
    w_find = soup.find("span", id="[省略]").text
    w_mean = soup.find("td", class_="[省略]").text
else:
    w_find = soup.select_one("[省略]").text
    w_mean = soup.select_one("[class='[省略]']").text

print("【"+ w_find +"】" + w_mean)
print("")


# 音声ファイルURL取得
SND_URL = soup.find("audio", class_="[省略]").find("source")['src']
print("【AUDIO FILE】" , end = "")
print(SND_URL)
print("")

root , ext = os.path.splitext(SND_URL)                  # 拡張子取得
DST_F = os.path.join(os.getcwd() ,"snd" , s_word+ext)   # 保存ファイル名取得

#print(DST_F)                                           # 保存ファイル名
#print(os.getcwd())                                     # プログラムフォルダ
#print(__file__)                                        # ファイルパス

try:
    download_file( SND_URL , DST_F )
    jdg_dl = "〇"
except:
    jdg_dl = "×"

#print("【DOWNLOAD】  " + jdg_dl )

messagebox.showinfo( w_find , w_mean )
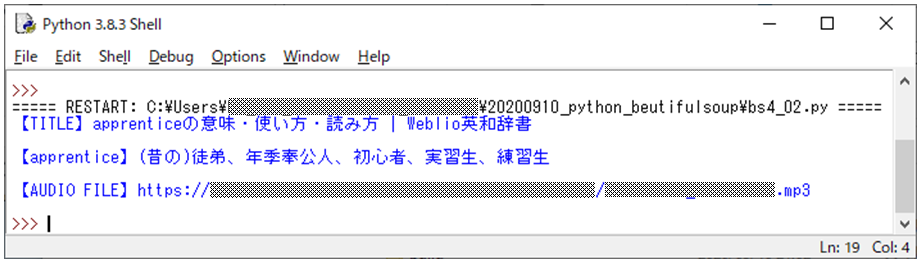
次の図の通り、WEBページタイトル,単語の意味,音声ファイルURLを取得し出力しています。
VBA対応の改造(連続処理)
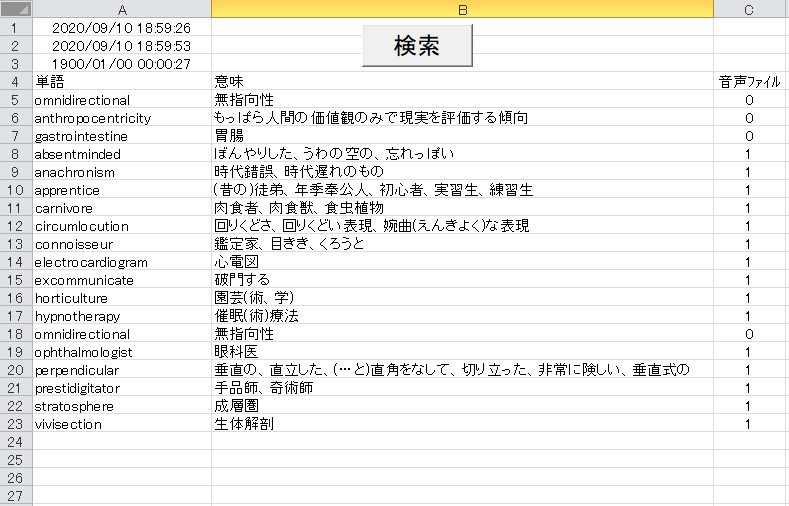
先回VBAからのIE操作による英単語検索同様にエクセルシート上の単語を連続して検索できる様に改造します。下図の通りシート外観は先回とほとんど同じです。
方法はエクセルVBAから、WshShell オブジェクトを利用し、シートの単語を1語づつ引数渡ししプログラム起動します。
先回に比べ、今回はブラウザー起動しないこともあり、下表の通り検索時間を大きく短縮することが出来ました。但し、VBA-IE操作 の場合でもブラウザーを非表示にして検索時間を短縮することも可能なのかもしれません。
| 方法 | 検索時間 (秒/19語) | 検索時間 (秒/語) |
| VBA-IE操作 | 171 | 9 |
| Python + BeautifulSoup4 | 27 | 1.42 |
■ WEB検索 Python プログラム改造
検索を行うPython側プログラムは、VBAから外部起動された時に引数として英単語を受け取り、テストプログラム同様にWEB検索後、結果をテキストファイル保存します。
import os
import sys
import urllib.error
import urllib.request
import requests
from bs4 import BeautifulSoup
import tkinter as tk
from tkinter import messagebox


def download_file( url , dst_path ):
    try:
        with urllib.request.urlopen(url) as web_file:
            data = web_file.read()

            with open(dst_path , mode="wb") as local_file:
                local_file.write(data)

    except urllib.error.URLError as e:
        print(e)


def search_e_word(e_wrd):

    s_word = e_wrd
    dirPth = "C:/Users/[省略]/snd/"
    html_text = requests.get("https://[省略]/content/" +s_word).text
    soup = BeautifulSoup(html_text, 'html.parser')                              # BeautifulSoup初期化

    w_mean = soup.find("td", class_="[省略]").text              # 単語意味取得

    try:
        SND_URL = soup.find("audio", class_="[省略]").find("source")['src']   # 音声ファイルURL取得

        root , ext = os.path.splitext(SND_URL)                                      # 拡張子取得
        DST_F = dirPth + s_word + ext                    # 音声ファイル保存名取得

        # 音声ファイルダウンロード
        download_file( SND_URL , DST_F )
        jdg_dl = "1"
    except:
        jdg_dl = "0"

    rslt = w_mean + "###" + jdg_dl

    DST_T = dirPth + s_word + ".txt"

    fileobj = open(DST_T , "w")
    fileobj.write(rslt)
    fileobj.close()

    return rslt


if __name__ == "__main__" :

    argv = sys.argv

    try:
        eng_wrd = argv[1]
    except:
        eng_wrd = "gastrointestine"

    root = tk.Tk()
    root.withdraw()

    rslt = search_e_word(eng_wrd)

    print(rslt)
■ VBAプログラム作成
VBA側は WshShell オブジェクト RunメソッドでPythonプログラムを終了待ちし、プログラム終了後テキストファイルの中身をエクセルシート上に表示します。
Option Explicit

'参照設定
'Windows Script Host Object Model

Private Sub CommandButton1_Click()
    Dim wsh As WshShell
    Dim cmd_str As String
    Dim ret

    Dim sht, wrd
    Dim cnt
    Dim rtn_m As Variant


    Set wsh = CreateObject("WScript.Shell")
    sht = ActiveSheet.Name
    cnt = 0

     Worksheets(sht).Cells(1, 1).Value = Now

    Do
        wrd = Trim(Worksheets(sht).Cells(5 + cnt, 1).Value)
        If wrd = "" Then Exit Do

        wrd = StrConv(StrConv(wrd, 8), 2)

        cmd_str = "python C:\Users\[省略]\bs4_03.py " + wrd

        ret = wsh.Run(cmd_str, 0, True) 'パス,ウィンドウスタイル,終了待ち

        rtn_m = Split(text_Open(wrd), "###")

        Worksheets(sht).Cells(5 + cnt, 2).Value = Replace(rtn_m(0), vbCrLf, "")
        Worksheets(sht).Cells(5 + cnt, 3).Value = rtn_m(1)

        DoEvents
        cnt = cnt + 1
    Loop

    Worksheets(sht).Cells(2, 1).Value = Now
End Sub


’ファイルを開く
Public Function text_Open(wrd)

    Dim FileName As String
    Dim FileNum As Integer
    Dim buf, str

    FileName = "C:\Users\pana-win10\kーdata\20200910_python_beutifulsoup_01\snd\" + wrd + ".txt"
    FileNum = FreeFile  'ファイル番号を取得

    'ファイルをシーケンシャル入力モードで開く
    Open FileName For Input As #FileNum

        'ファイルの末尾まで繰り返す
        Do Until EOF(FileNum)

            'テキストファイル 1 行分を変数 buf に格納する
            Line Input #FileNum, buf
            str = str & vbCrLf & buf

        Loop

    'ファイルを閉じる
    Close #FileNum

    text_Open = str

End Function
尚、 WshShell オブジェクト 利用の為、下図の“Windows Script Host Object Model” を参照設定しています。

pythonプログラムの EXE 化
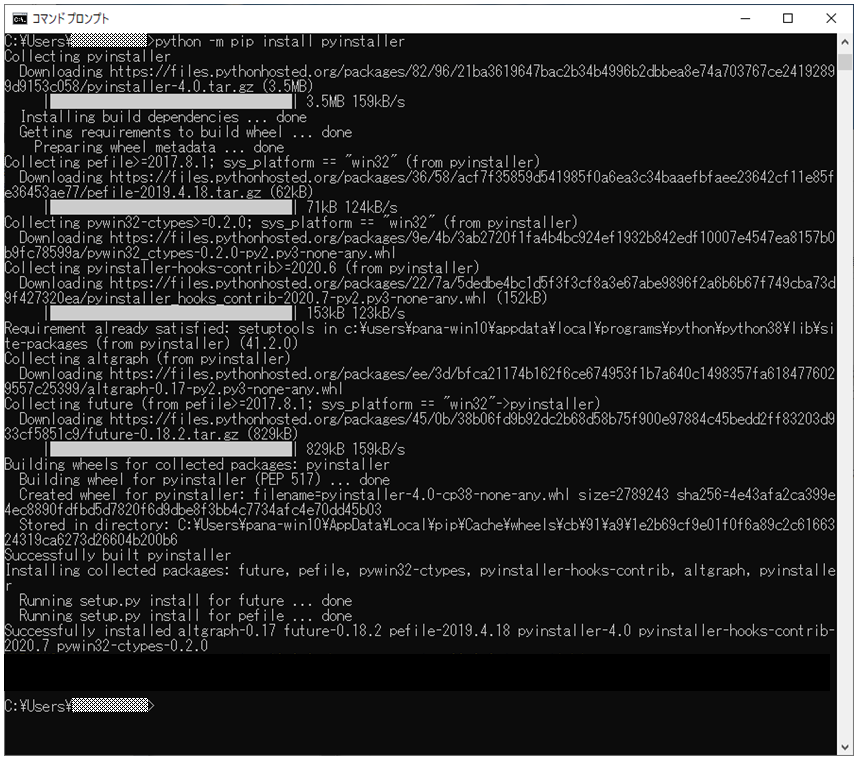
pyinstaller をインストールします。
[ python -m pip install pyinstaller ]
コマンドプロントで、変換対象 python プログラムがあるフォルダーに移動し、下記コマンドで exe ファイルに変換します。
[ pyinstaller bs4_02.py –onefile ]
オプションの ‘–onefile’ は関連ファイルを1つにまとめてexeファイルを作成し、‘–noconsole’ はコマンドプロンプトを表示しない様にする様です。。
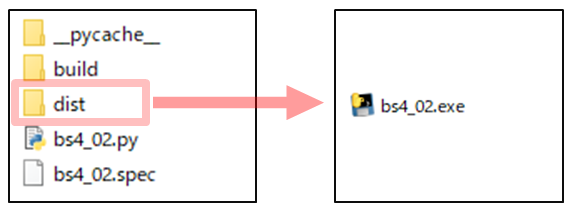
下図 元の ‘bs4_02.py’ ファイル以外のフォルダ,ファイルは変換処理によって生成されたものです。フォルダ [ dist ] の中にexe ファイルが生成されます。
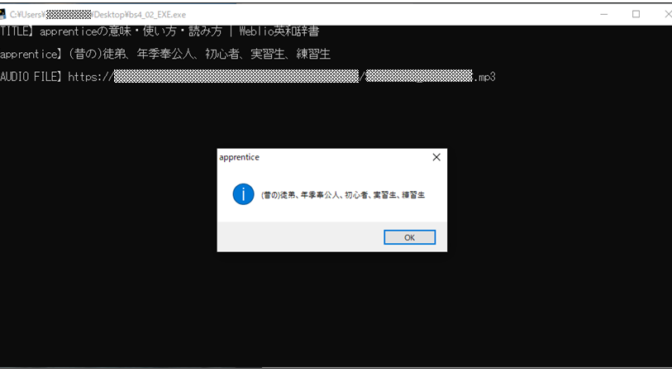
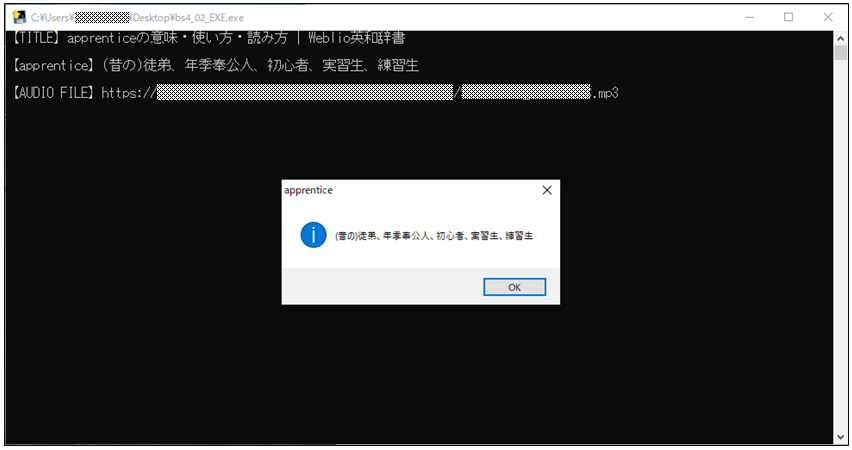
下記の通り動作確認出来ましたが、少し、遅くなった様な気がします。 他環境での検証は別途必要でしょう。 ‘–noconsole’ オプションを指定していないので、メッセージボックス背景にコマンドプロンプトが表示されています。
まとめ
python プログラムを exe ファイルに変換出来ることを知ったのは大きな収穫です。利用範囲も拡がると思います。
他にも “xlwings” ,” OpenPyXL ” などの仕組もある様ですので、機会があれば確認してみたいと思います。